I love it when my art skills are summoned to benefit a worthy charity. Most artists are asked (and asked and asked) to donate paintings for the ever-popular "silent auctions" but I much perfer when they come to me with a real project that I can have a little creative fun with. Such was the case when my daughter-in-law Alex asked if I would paint two giant "cakes" for the 75th anniversary celebration of our local March of Dimes chapter. I was intrigued but I am also NOT a graphic artist! I knew there would be some punting involved and I want to share with you something I have learned that will help you out as well.
First the "cakes"....cut out of plywood. I primed the wood, both sides and then set in to "ice" and decorate them.
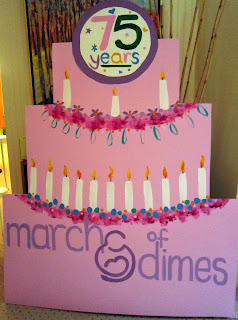 |
| note the reproduction of their official logo... |
Fun. They are over five feet tall so had to be very bright and eye catching but still use the purple colors of the logo and tie in their round "75 years" logo.
 |
.
|
One of my favorite blogs,
In My Own Style, often shares very practical ways to add personalized touches to crafts. One of her techniques is to design the lettering you want to replicate on the computer, adjust to the size you will actually want it to appear, print it and, using graphite paper, transfer it to the object you are painting. Here is only one of her methods:
click
So off to the printer I went where I blew up the mother and child logo about 400x til I had a size I could use. Positioning it on the board with masking tape I then slid the graphite paper underneath and went over the lines with a ball point pen which copied it onto the surface. I now had my outlines to paint. I managed to do the letters freehand (easy font) but I have also used this method for words.
Example:
Lots of different fonts on this one but the same method used. Alex was re-doing her laundry room and wanted some bright sayings for the wall...I did two and this method make the lettering so much easier and neater. I'm still not a graphic artist but at least I can punt when it comes to faking the letters!
Have fun trying this out...you, too, can look like a pro!!
Cindy

No comments:
Post a Comment
Include your comment below, will forgo the word verification part until I receive spam.